Account configuration
Configuring Wallee involves multiple steps and is more complex than most payment gateways. Please ensure you proceed with every step described in this page. Any mistake can cause things to not work smoothly.
Basic setup
Step 1: Login
Login to your Wallee Payment Service, for example https://checkout.postfinance.ch/
Step 2: Disable email feature
Navigate to Space > Settings > Features and make sure the Email feature is turned off. WHMCS will handle email communication with the customer.
Step 3: Create a Role
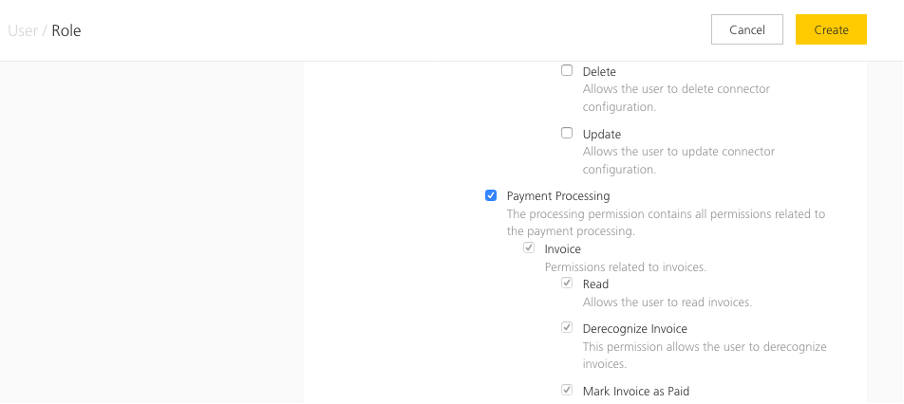
- Navigate to
Account > Roles > Create role - Give it a name
- Scroll down and tick
Payment Processing - Click on
Createto confirm
Step 4: Create an Application User
- Navigate to
Account > Application Users > Create application user - Give it a name
- Note the User ID and Authentication Key, you will need them later!
- Click on
Assign a role - For each of the three roles shown, assign the role you created in the previous step
- Click on
Save roles
Step 5: Create a Space
If you already have a Space, you can skip this step
- Navigate to
Account > Spaces > Create space - Fill the form out, especially the required fields
- All other settings can remain at their defaults
- Click
Create
Step 6: Enable Webhook feature
- Navigate to
Space > Settings > Features - Make sure
Webhookis enabled
Step 7: Create Webhook URL
- Navigate to
Space > Settings > General tab - Click on
Webhook URLs - Click on
Create webhook URL - Give it a name and insert the URL to the callback on your WHMCS install. For example: https://whmcs.blabla.tld/modules/gateways/callback/wallee.php
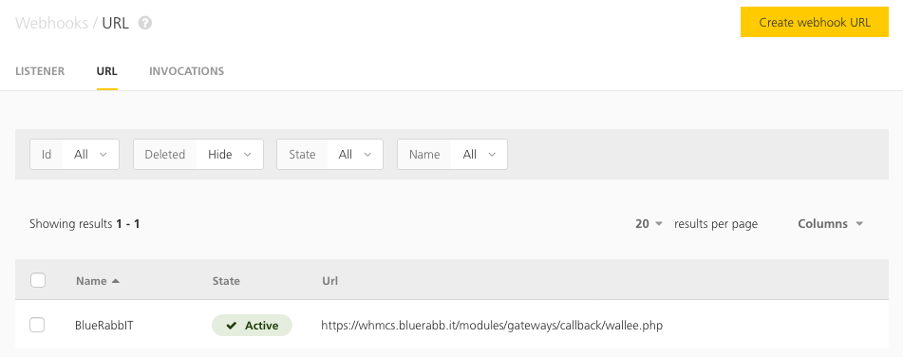
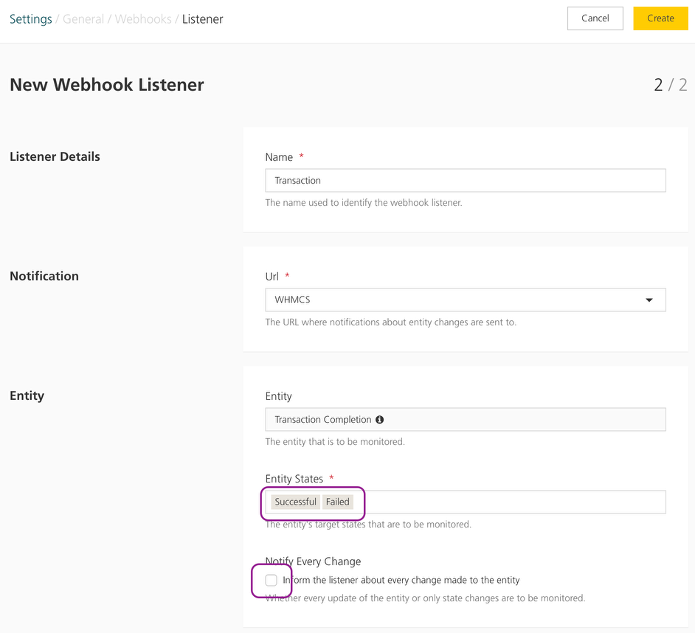
Step 8: Configure Transaction Webhook listener
- Navigate to
Space > Settings > General tab > Webhooks Listeners > Create webhook listener - Choose the
Transaction Completionentity and clickContinue - Give it a name, for example
WHMCS Transaction, and choose the Url you previously created - Choose the
SuccessfulandFailedentity states - Important: Make sure the
Notify Every Changecheckbox remains unchecked! - Click on
Create
Advanced setup (one-click payments)
The following steps need to be implemented if you plan to use one-click payments, which allow WHMCS to store payment tokens for the customers and automatically charge them on recurring payments.
One-Click Payments require the Tokens feature to be active in your account. Not all subscriptions have this feature, so please make sure you have it before setting this up!
Step 9: Configure Token Webhook listener
- Navigate to
Space > Settings > General tab > Webhooks Listeners > Create webhook listener - Choose the
Tokenentity and clickContinue - Give it a name, for example
WHMCS Token, and choose the Url you previously created - Choose the
InactiveandDeletedentity states only - Important: Make sure the
Notify Every Changecheckbox remains unchecked! - Click on
Create

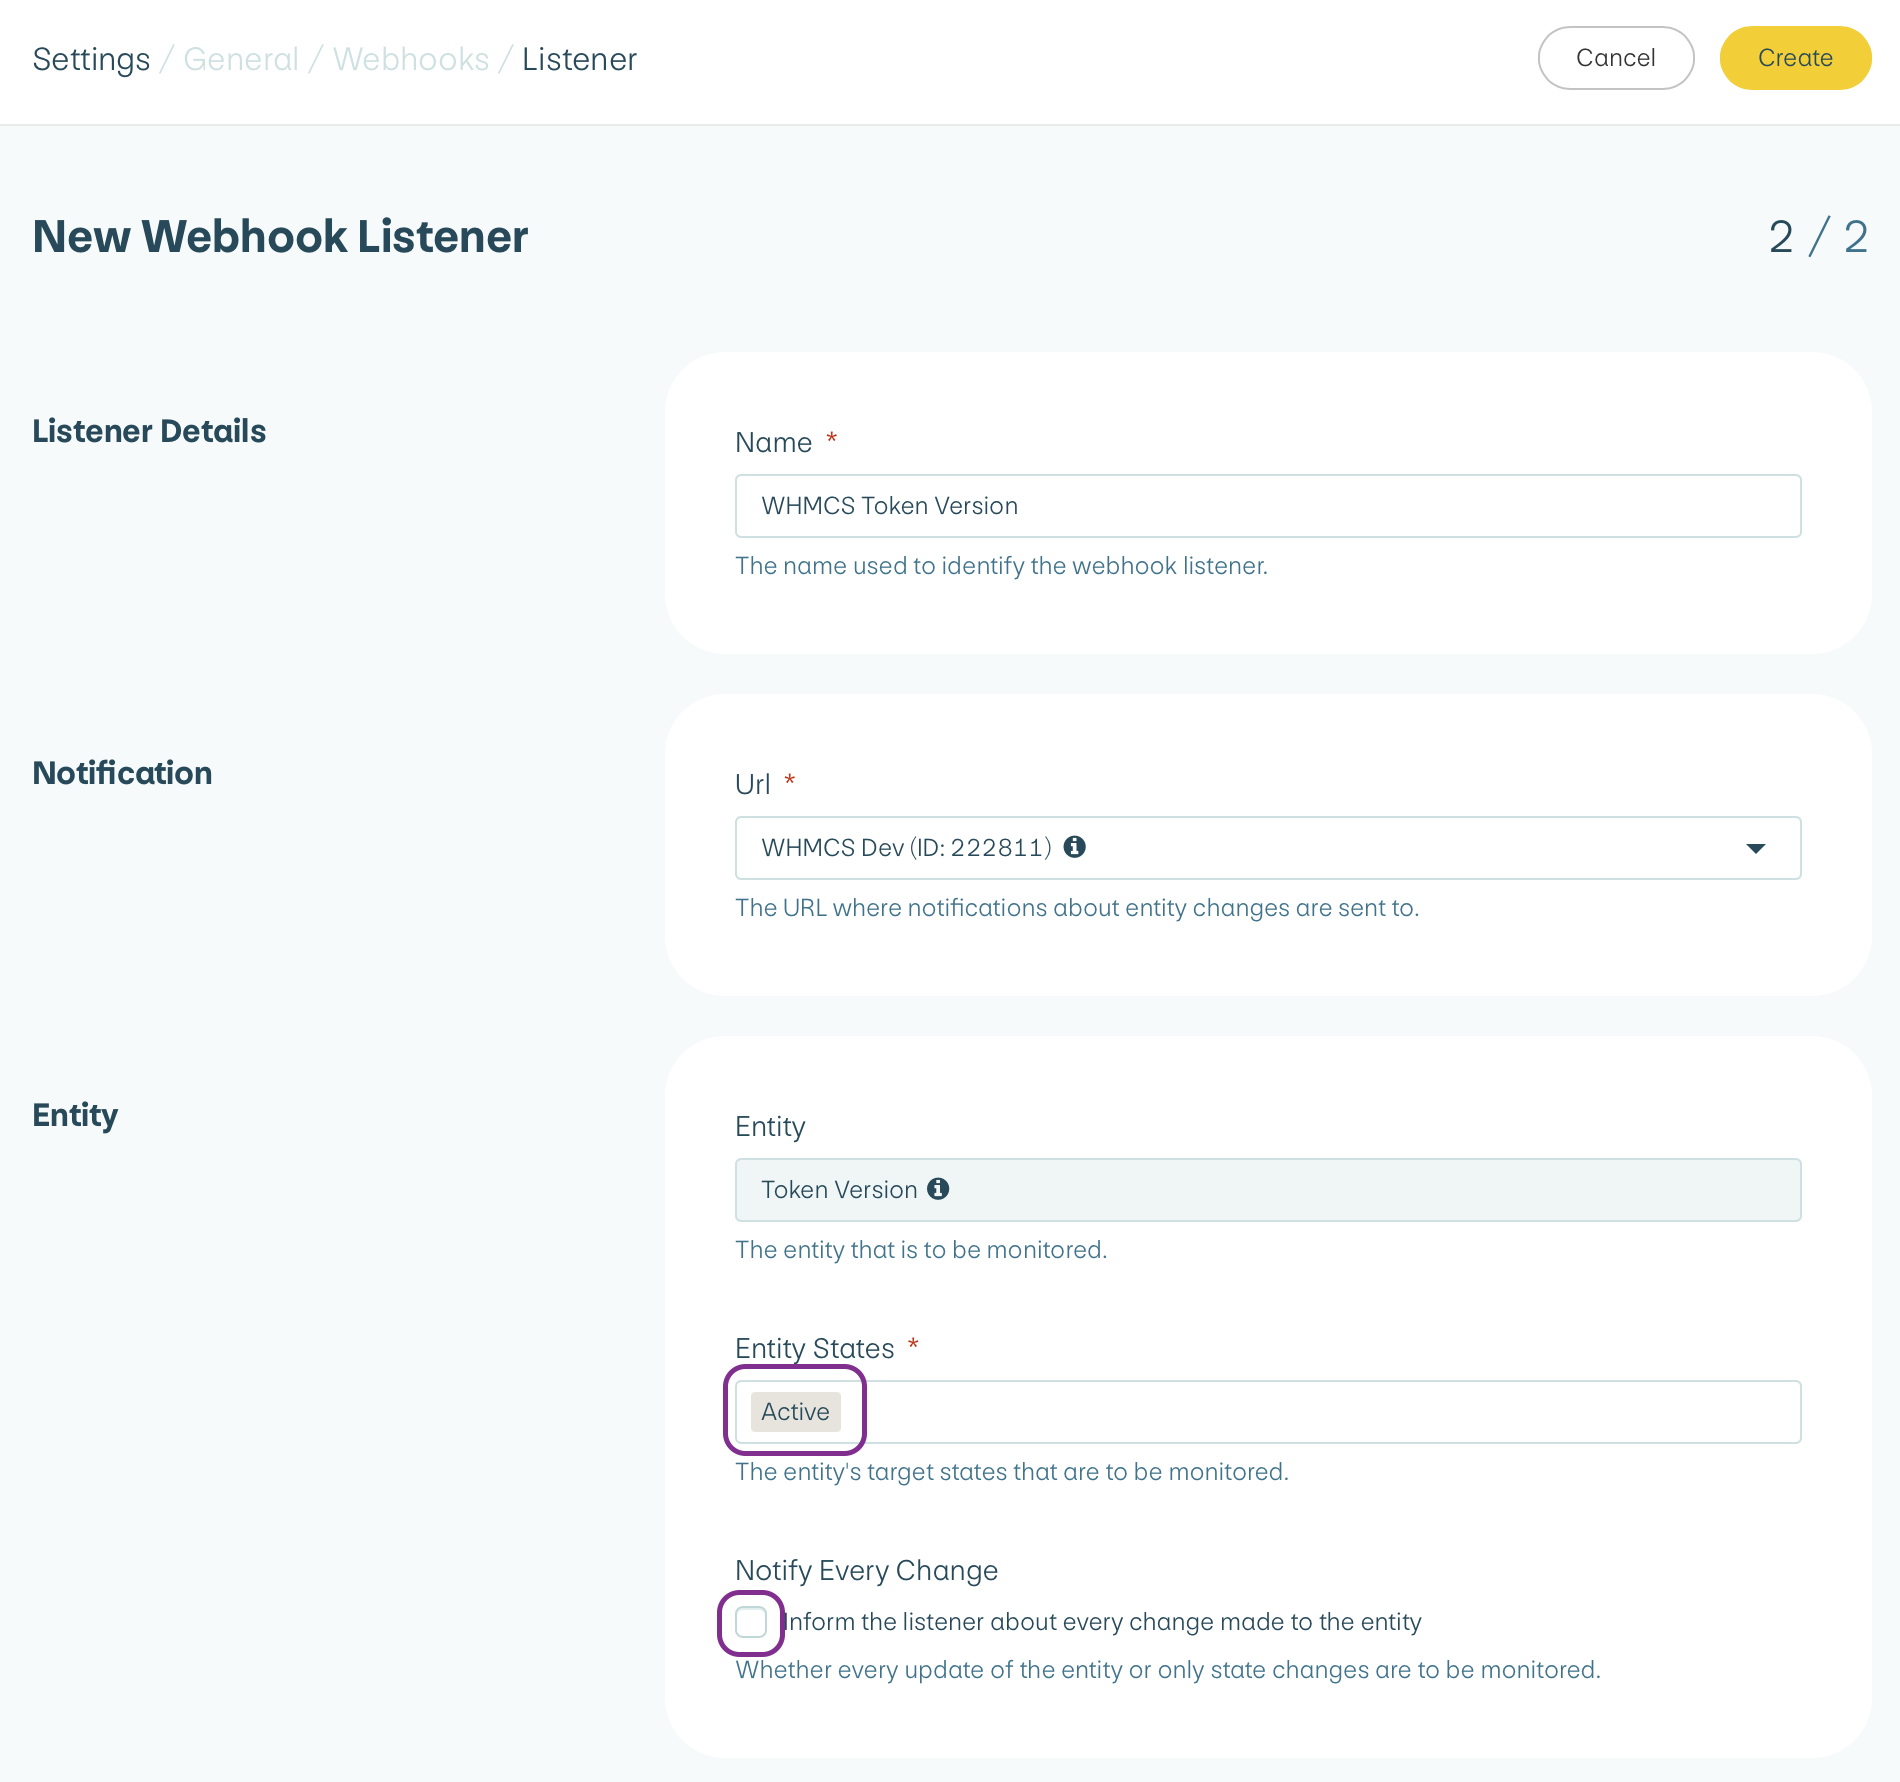
Step 10: Configure Token Version Webhook listener
- Navigate to
Space > Settings > General tab > Webhooks Listeners > Create webhook listener - Choose the
Token Versionentity and clickContinue - Give it a name, for example
WHMCS Token Version, and choose the Url you previously created - Choose the
Activeentity state only - Important: Make sure the
Notify Every Changecheckbox remains unchecked! - Click on
Create
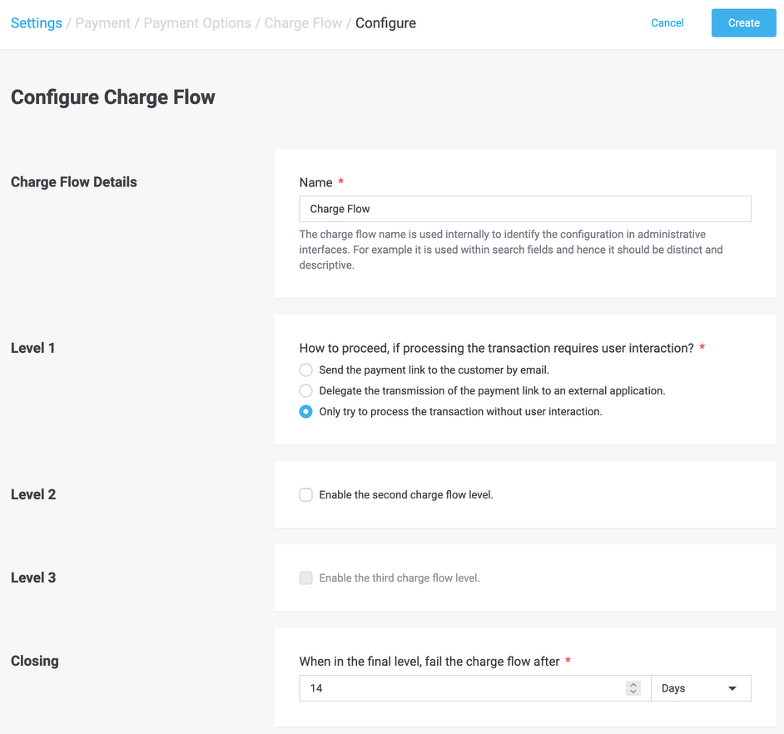
Step 11: Configure Charge Flow
- Navigate to
Space > Settings > Payment tab > Charge Flows > Configure Charge Flow - Configure Level 1 to
Only try to process the transaction without user interaction - Disable Level 2 and Level 3
- Click on
Create
Step 12: Enable One Click Payment in Payment Methods
- Navigate to
Space > Settings > Payment tab > Payment Methods - Edit every active payment method
- Ensure that
One-Click Paymentis set toAllow Storage.

Please note that not all payment methods and connectors support this.